HOW TO WRAP TEXT IN AN EXCEL
Wrap text means wrap extra long text into multiple lines you can see all of it. Microsoft Excel can wrap a text so it appears on multiple lines in a cell. You can format the cell so the text wraps automatically or enter a manual line break.
NOTE: When auto row height is not enabled, this might not work.
STEPS INVOLVED TO WRAP A TEXT IN MICROSOFT EXCEL
- In the worksheet, select the cells you want to format.

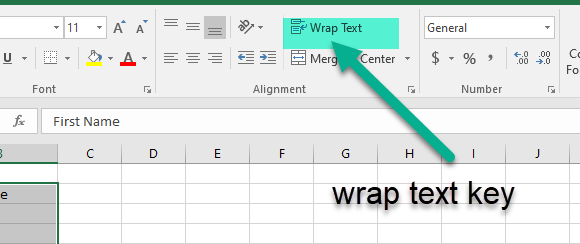
2. On the Home tab, in the Alignment group, click Wrap Text. (On Excel for desktop, you can also select the cell, and then press Alt + H + W.) .
3. Adjust the row height to make all wrapped text visible.
- Select the cell or range for which you want to adjust the row height.
- On the Home tab, in the cells group, Click format.
- Under the cell size do one of these; to automatically adjust the row height, Click Autofit Row Height, to specify the row height click the row and height and adjust the row and height in the row height box.
A video tutorial will be posted underneath to explain everything for everyone to practice. If you have any question up to this point in the lecture you can provide it at the comment section provided.
👇
A PODCAST IN PODOMATIC FOR YOU TO LISTEN
Below is a podcast explaining how to wrap a text in an excel file. I entreat each and every students to watch and listen and practice along.
👇


No comments:
Post a Comment